Creating new work requests
Do the following:
-
Select the Tools tab > Manage group > Work Requests. The Work Request Manager dialog opens.
-
Click New. The New Work Request dialog opens.
-
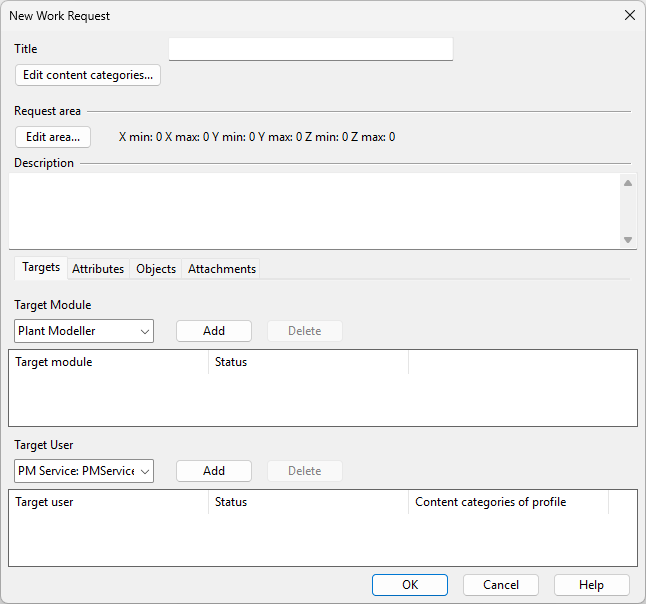
Define the general work request information:
Enter a descriptive title for the work request. This is required information.
Select this in a project that is configured to use Content Categories to assign the work request to the required content categories. Consider the following:
-
Work requests not assigned to content categories are visible to everybody.
-
Work requests assigned to content categories are only visible to those users whose User Profile in COS allows those categories.
-
Objects have their own content category assignments, as described in Manage Content Categories. Conflicting setups may allow the users to see the work request but not the linked objects, or the other way round.
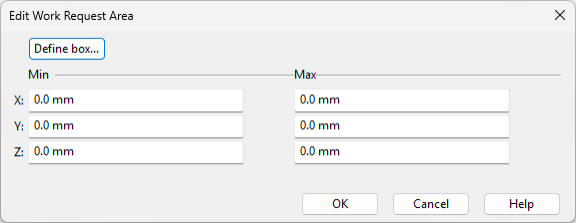
Select this to open the Edit Work Request Area dialog where you can define the min–max limits of the work request area. If all values are zero, the area has not been set.
Describe the context of the work request.
-
-
Define additional information on relevant tabs:
On the Targets tab, specify which applications—and, optionally, which users—this work request applies to.
On the Attributes tab, specify which Attributes to assign to this work request.
Note: For the reply function to work, the attributes to include must be available to both 'Work Request' and 'Work Request Reply' COS object types.
On the Objects tab, specify which model objects to include in the work request.
-
To add objects, click Assign, select the objects from the model, and press Enter.
-
To remove objects, select the objects, click Deassign, and confirm the removal.
Consider the following:
-
Objects should be located within the Request area for all work request filters to work correctly. When creating the Work Request object, you are prompted to expand the area, if needed.
-
Content categories should match those of the work request (see Edit content categories), because conflicting setups may allow the users to see the work request but not the linked objects, or the other way round. When creating the Work Request object, you are prompted to add the missing categories, if needed.
On the Attachments tab, specify which external files to attach to the work request. Consider the following:
-
You can attach files of any type and size. However, because they are stored in the COS server's document repository, large attachments will increase the COS backup size and slow down the backup process.
-
You can attach multiple versions of the same file with the same name. The files are displayed as linked and can be viewed individually.
eBrowser models and markups have dedicated handling, as described in Handling work request file attachments for eBrowser models and markups.
-
-
Click OK. The following might happen:
-
You are prompted that the work request does not have all the content categories that its objects have.
Select Yes to allow adding the missing categories to the work request, or No to keep the current setup. If you choose No, users allowed to see the linked objects might not be allowed to see the work request.
-
You are prompted that the work request area does not contain all the included objects.
Select Yes to allow expanding the area, or No to keep the current setup. If you choose No, the Show filter Request area intersecting my area will not work correctly.
Then, the new Work Request object is created with the status 'Open', displayed in the Work Request Manager, and becomes available to the targeted applications and users when they load work requests from COS.
-
-
To exit the Work Request Manager, click Close.